
Deal toys can gain depth through custom-cut silhouettes, photographs printed on clear material, printing on front and rear surfaces, and separate components arranged in layers. The right combination depends on what makes the subject recognizable, how the piece will be viewed, and the space needed for the transaction information.
A meaningful building, skyline, product or company symbol gives us a starting point. A photograph brings detail and perspective. A cut shape gives it a physical outline. Printing and layering let us place parts of the composition at different depths. We consider these choices together with the project's budget and delivery requirements.
The skyline piece below is a good example. Two shaped city photographs frame a rectangular collection of property images, with a taller clear panel behind them. From the front, the images form a connected composition. From an angle, the thickness and placement of the individual pieces become much easier to see.
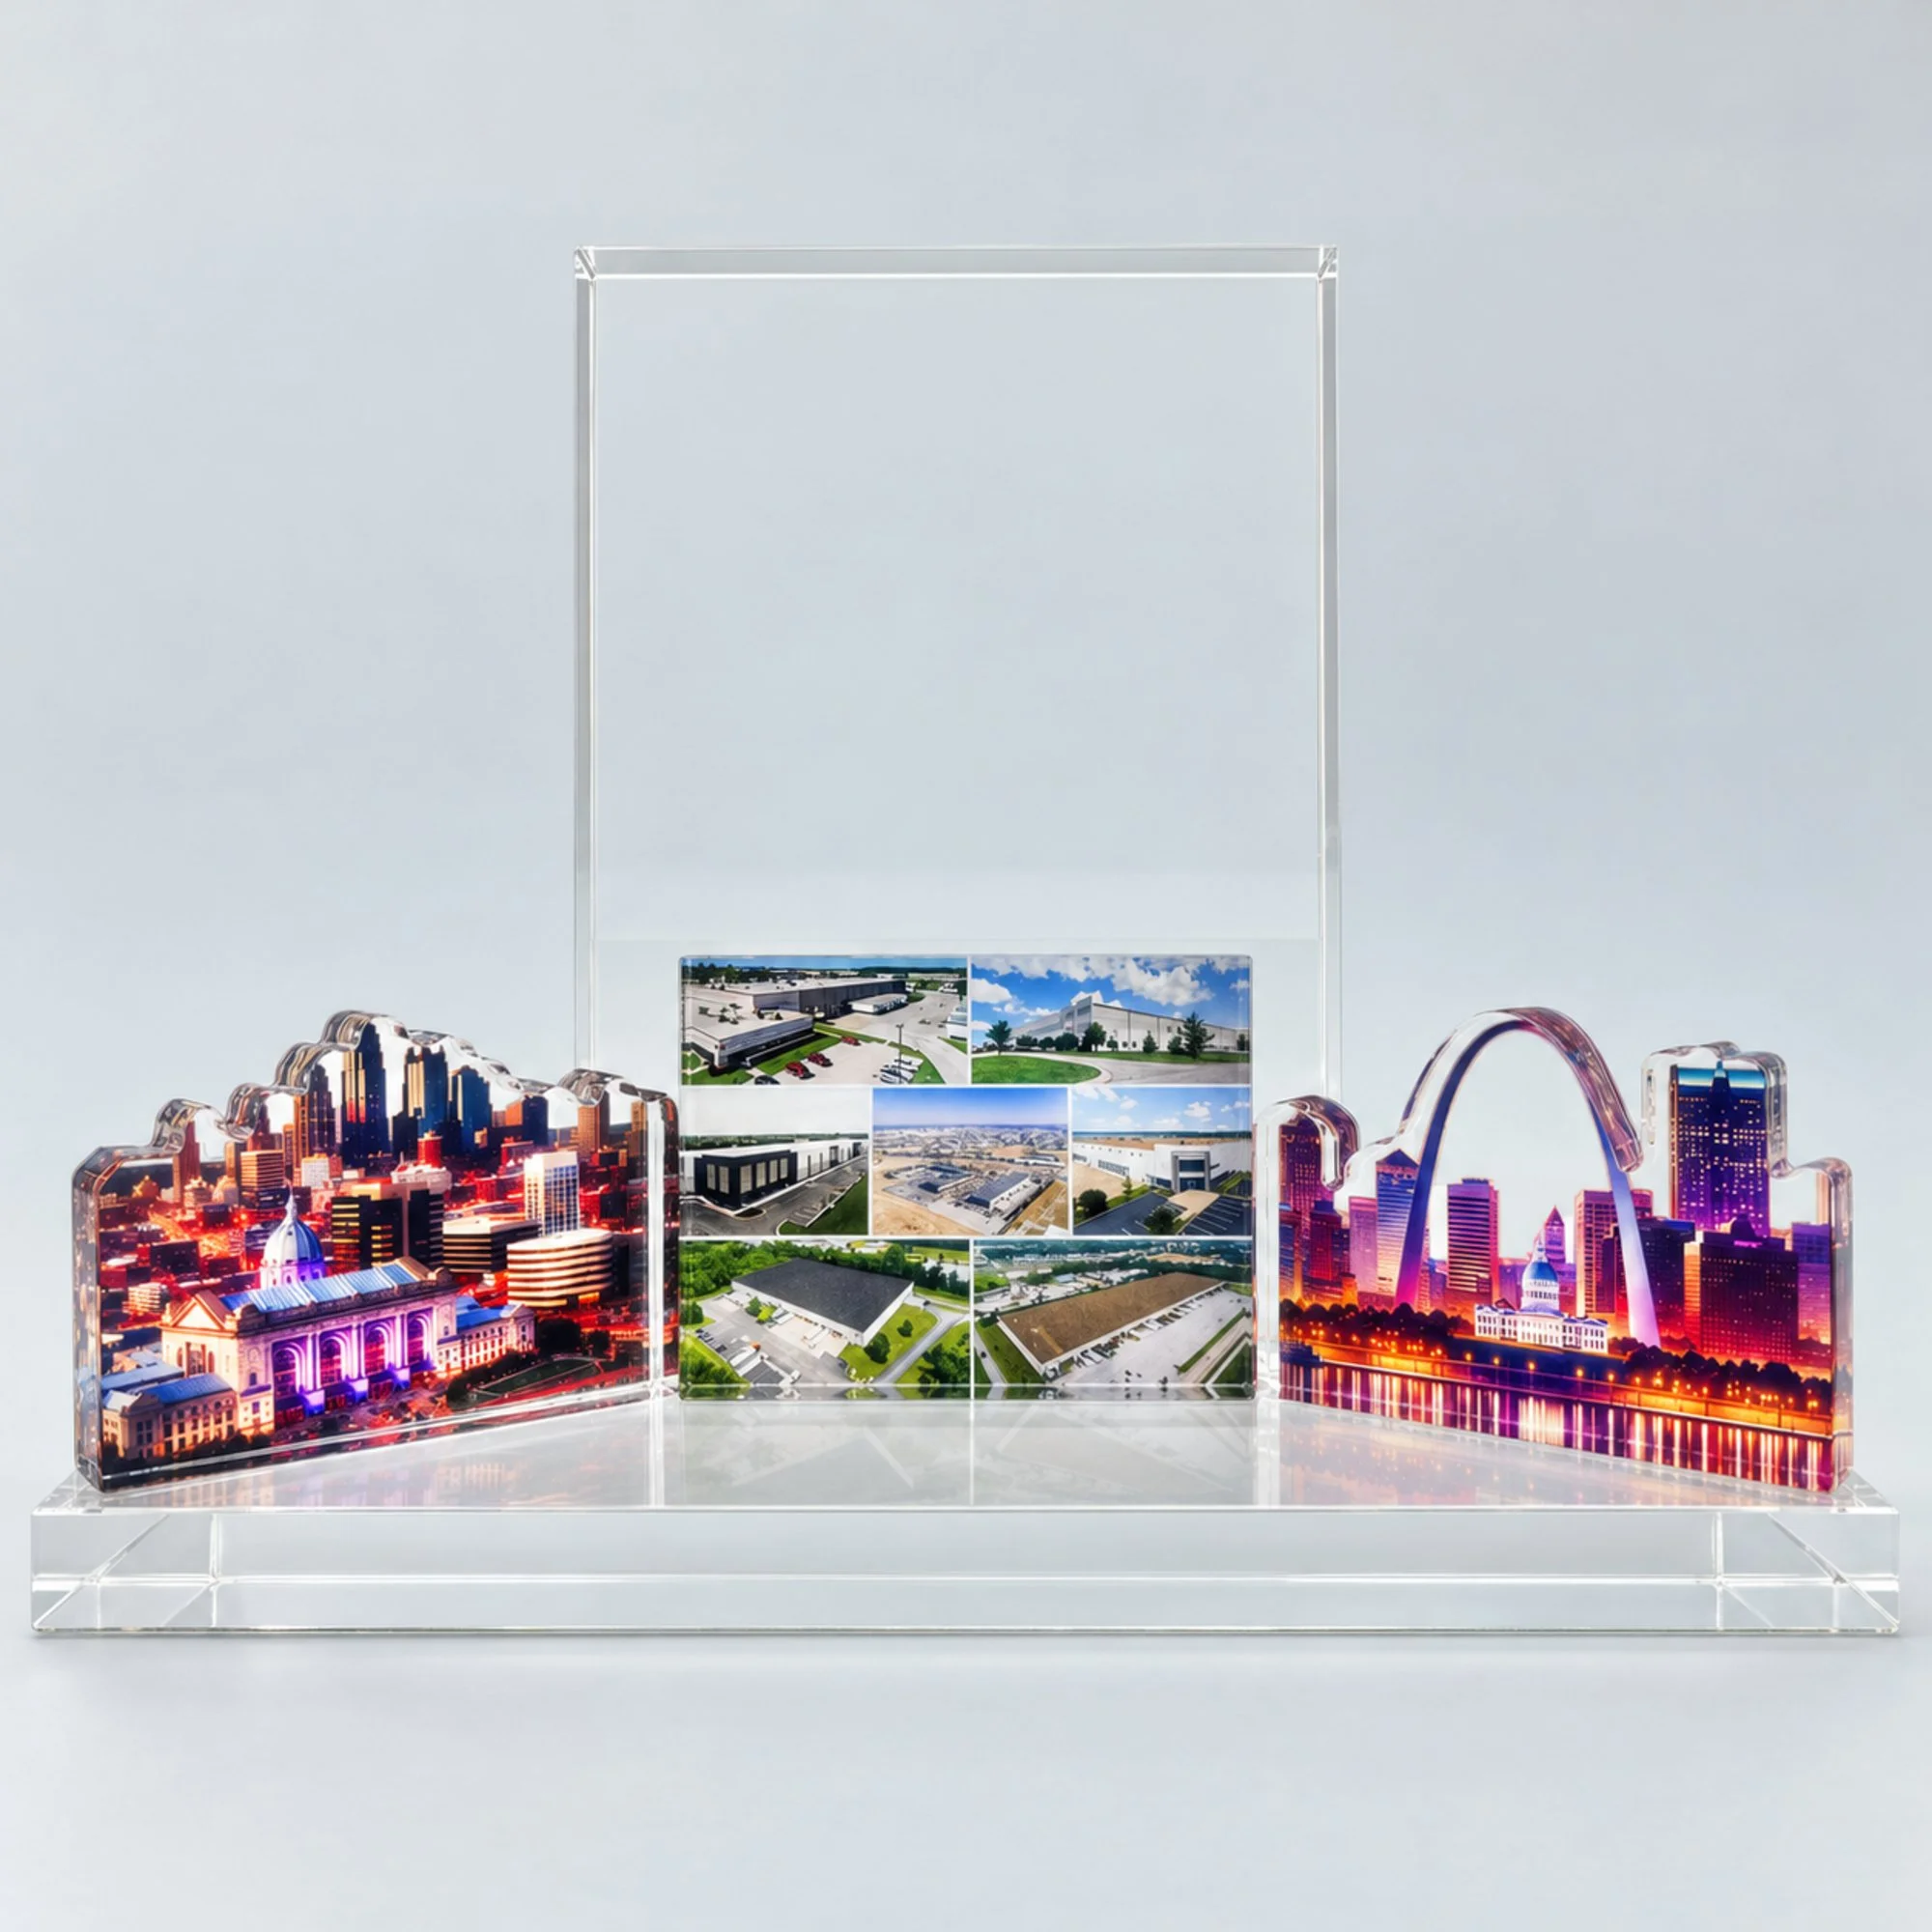
Contour-cut skyline photographs frame a rectangular property montage, with a taller clear panel behind them.
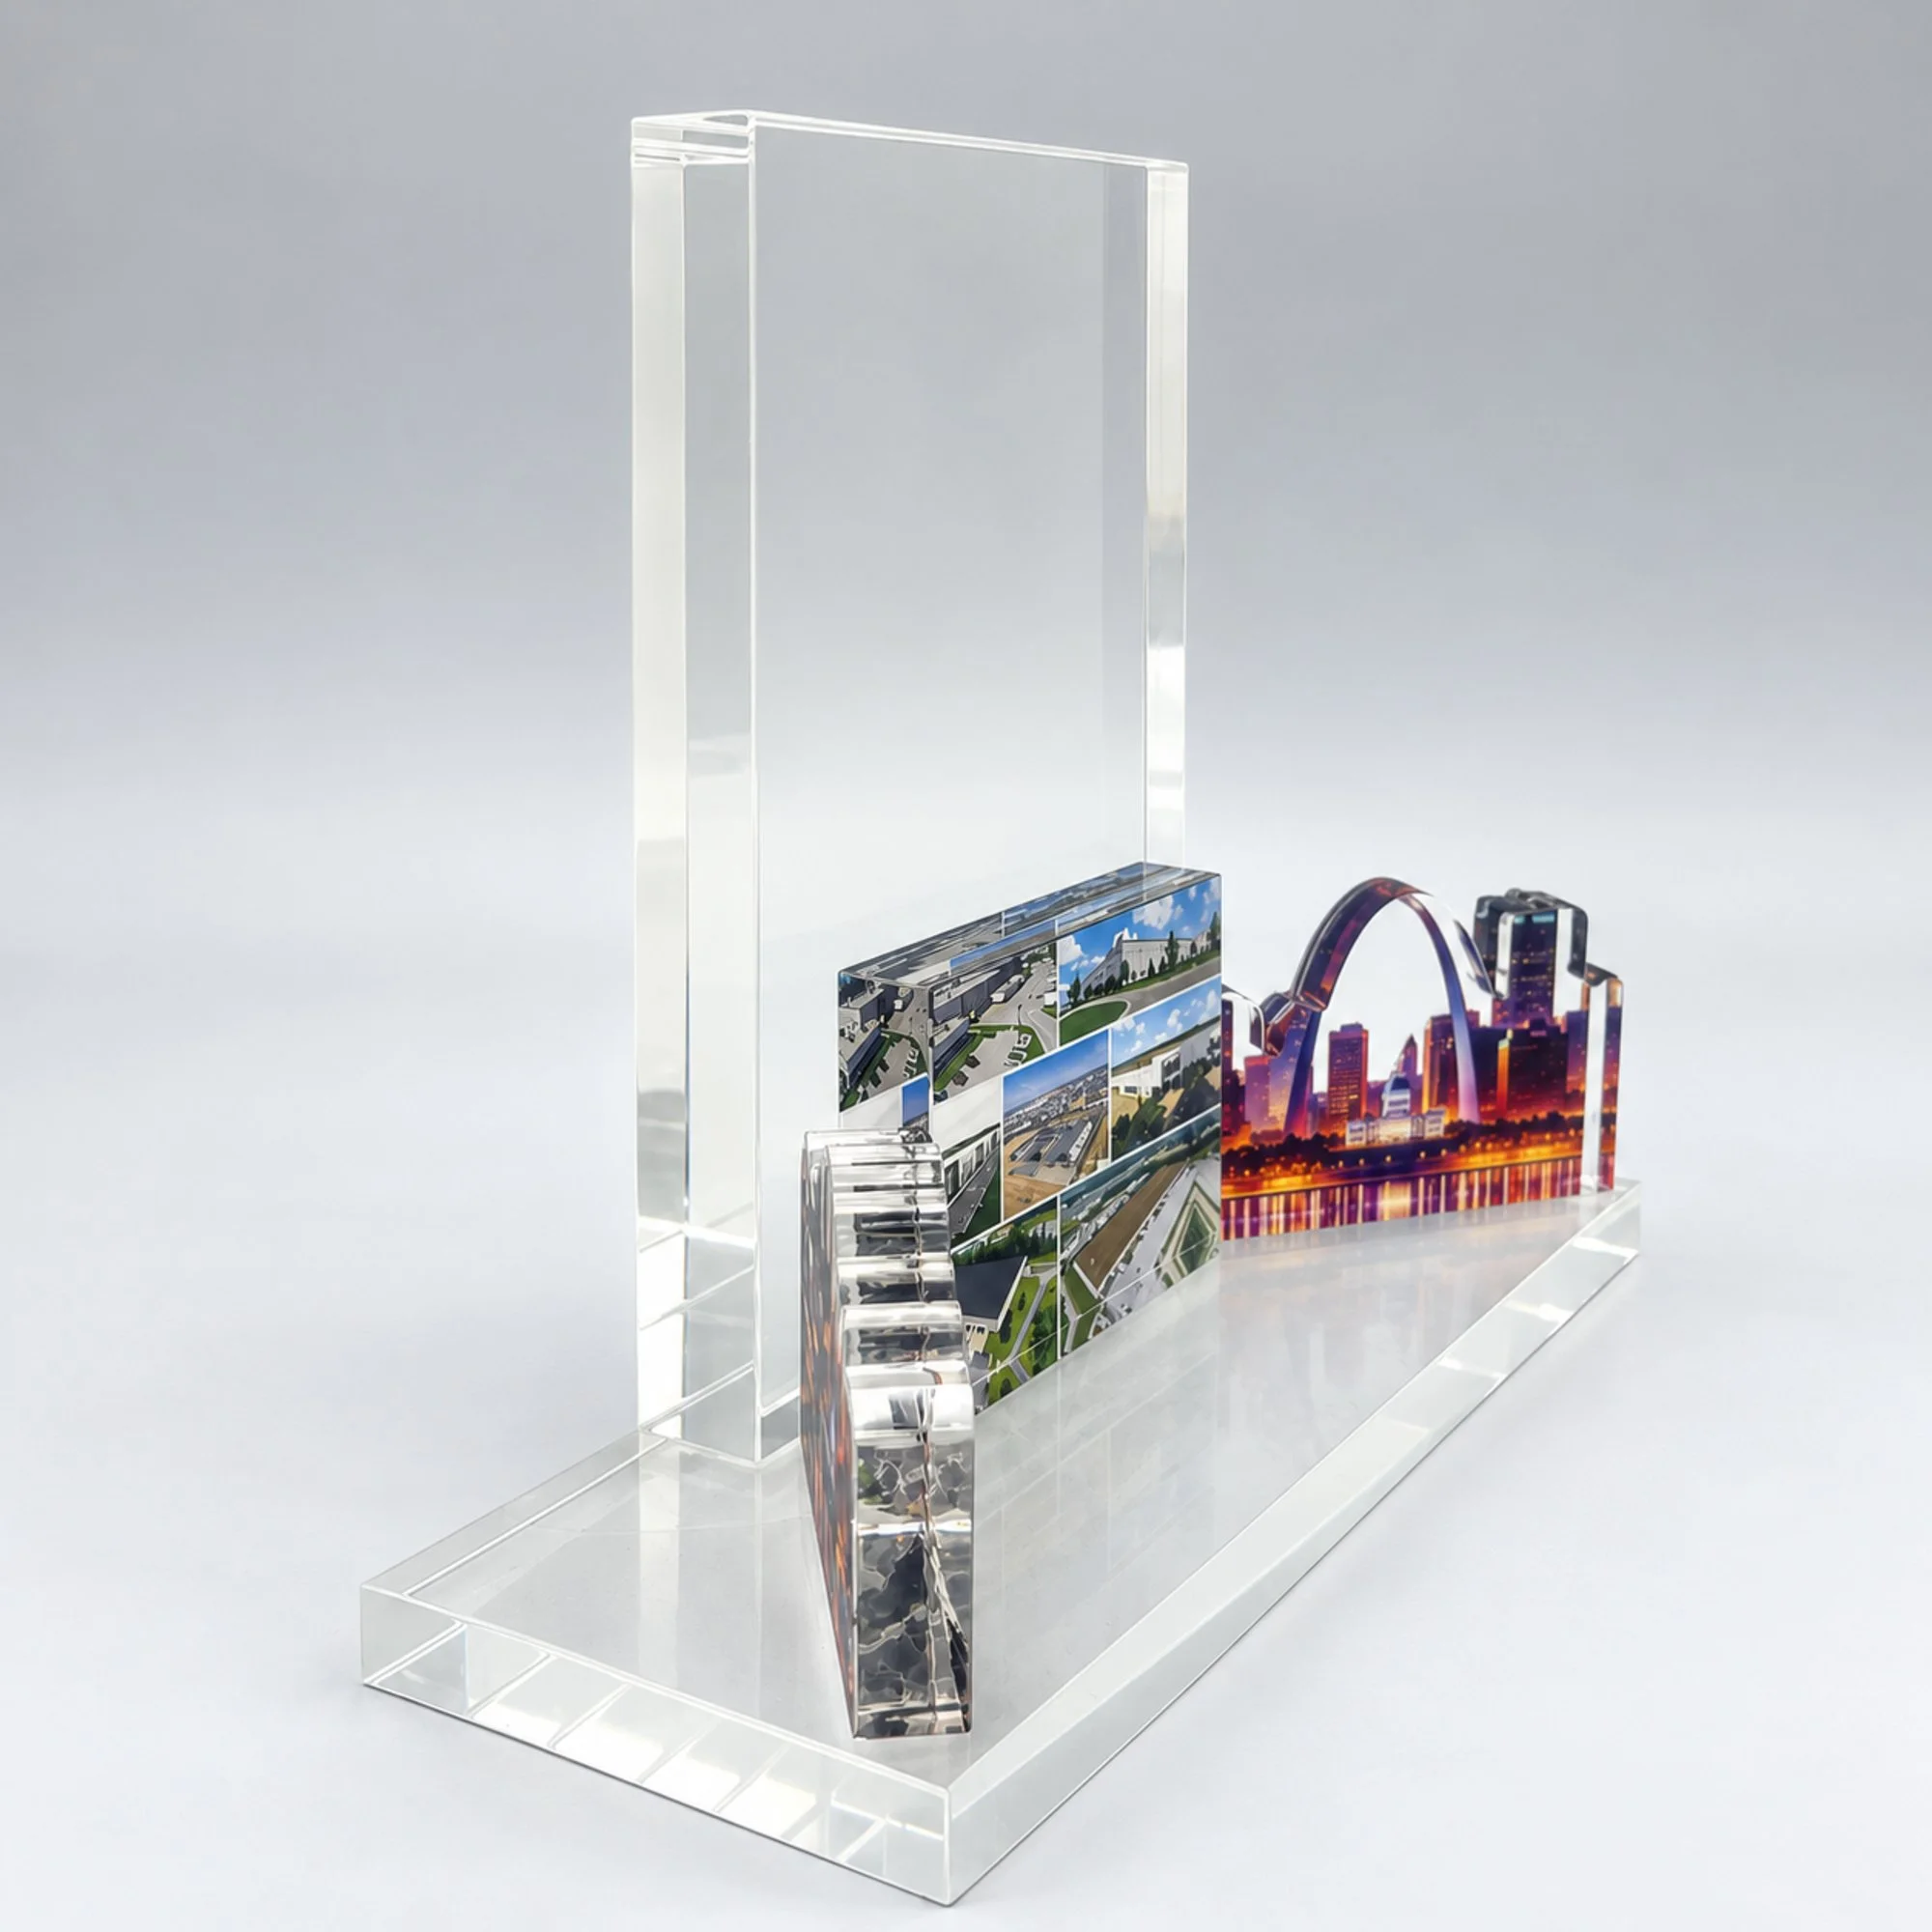
The angled view reveals the separate planes and physical thickness that give the composition its depth.
How can a photograph become a dimensional deal toy?
For a suitable design, a clear crystal panel can be cut to follow the outline of a building, vehicle or other subject, then finished and printed. With the photograph printed on the back and facing forward, you look through the clear material to see it. The photograph supplies recognizable details, while the outline and the thickness of the panel give it a physical presence.
A photo-printed cut shape presents the subject from the photograph's chosen viewpoint. Its edges and thickness are physical, but it does not show the subject's other sides as a sculpture would. Internal 3D laser etching is a separate process that creates an image within suitable clear crystal; it is not rear-surface printing.
The outline needs its own attention. A roofline may be important to recognizing a property. A very small projection may be better carried by the printing, with the surrounding contour simplified to suit the material and scale. We consider which details need to become part of the edge and which read clearly in the image.
A cut shape can also carry a logo, a symbol or a simple area of color. A bold red logo shape placed in front of a separate clear panel, for example, uses its outline and position to establish the design. Photographs are one of several ways to make a shaped component meaningful.
Crystal and acrylic both offer possibilities for cut shapes. Their fabrication, finishing and support requirements help determine which material suits the particular design.
How does printing on two surfaces create depth?
Depth can also come from the front and back surfaces of a single clear piece. We can print an image on the rear surface, facing forward through the material, and place additional printing on the front. The thickness of the clear piece physically separates the two printed surfaces.
That gives us a useful way to organize the artwork. A background image can sit behind a foreground graphic or inscription. The circuit-themed example uses front- and rear-surface printing to give the imagery a layered appearance within one panel.
The relationship between those surfaces needs to be planned. We look at where the images overlap, how much clear space remains and how the design reads from the front and from an angle. Front lettering needs enough contrast against whatever appears behind it.
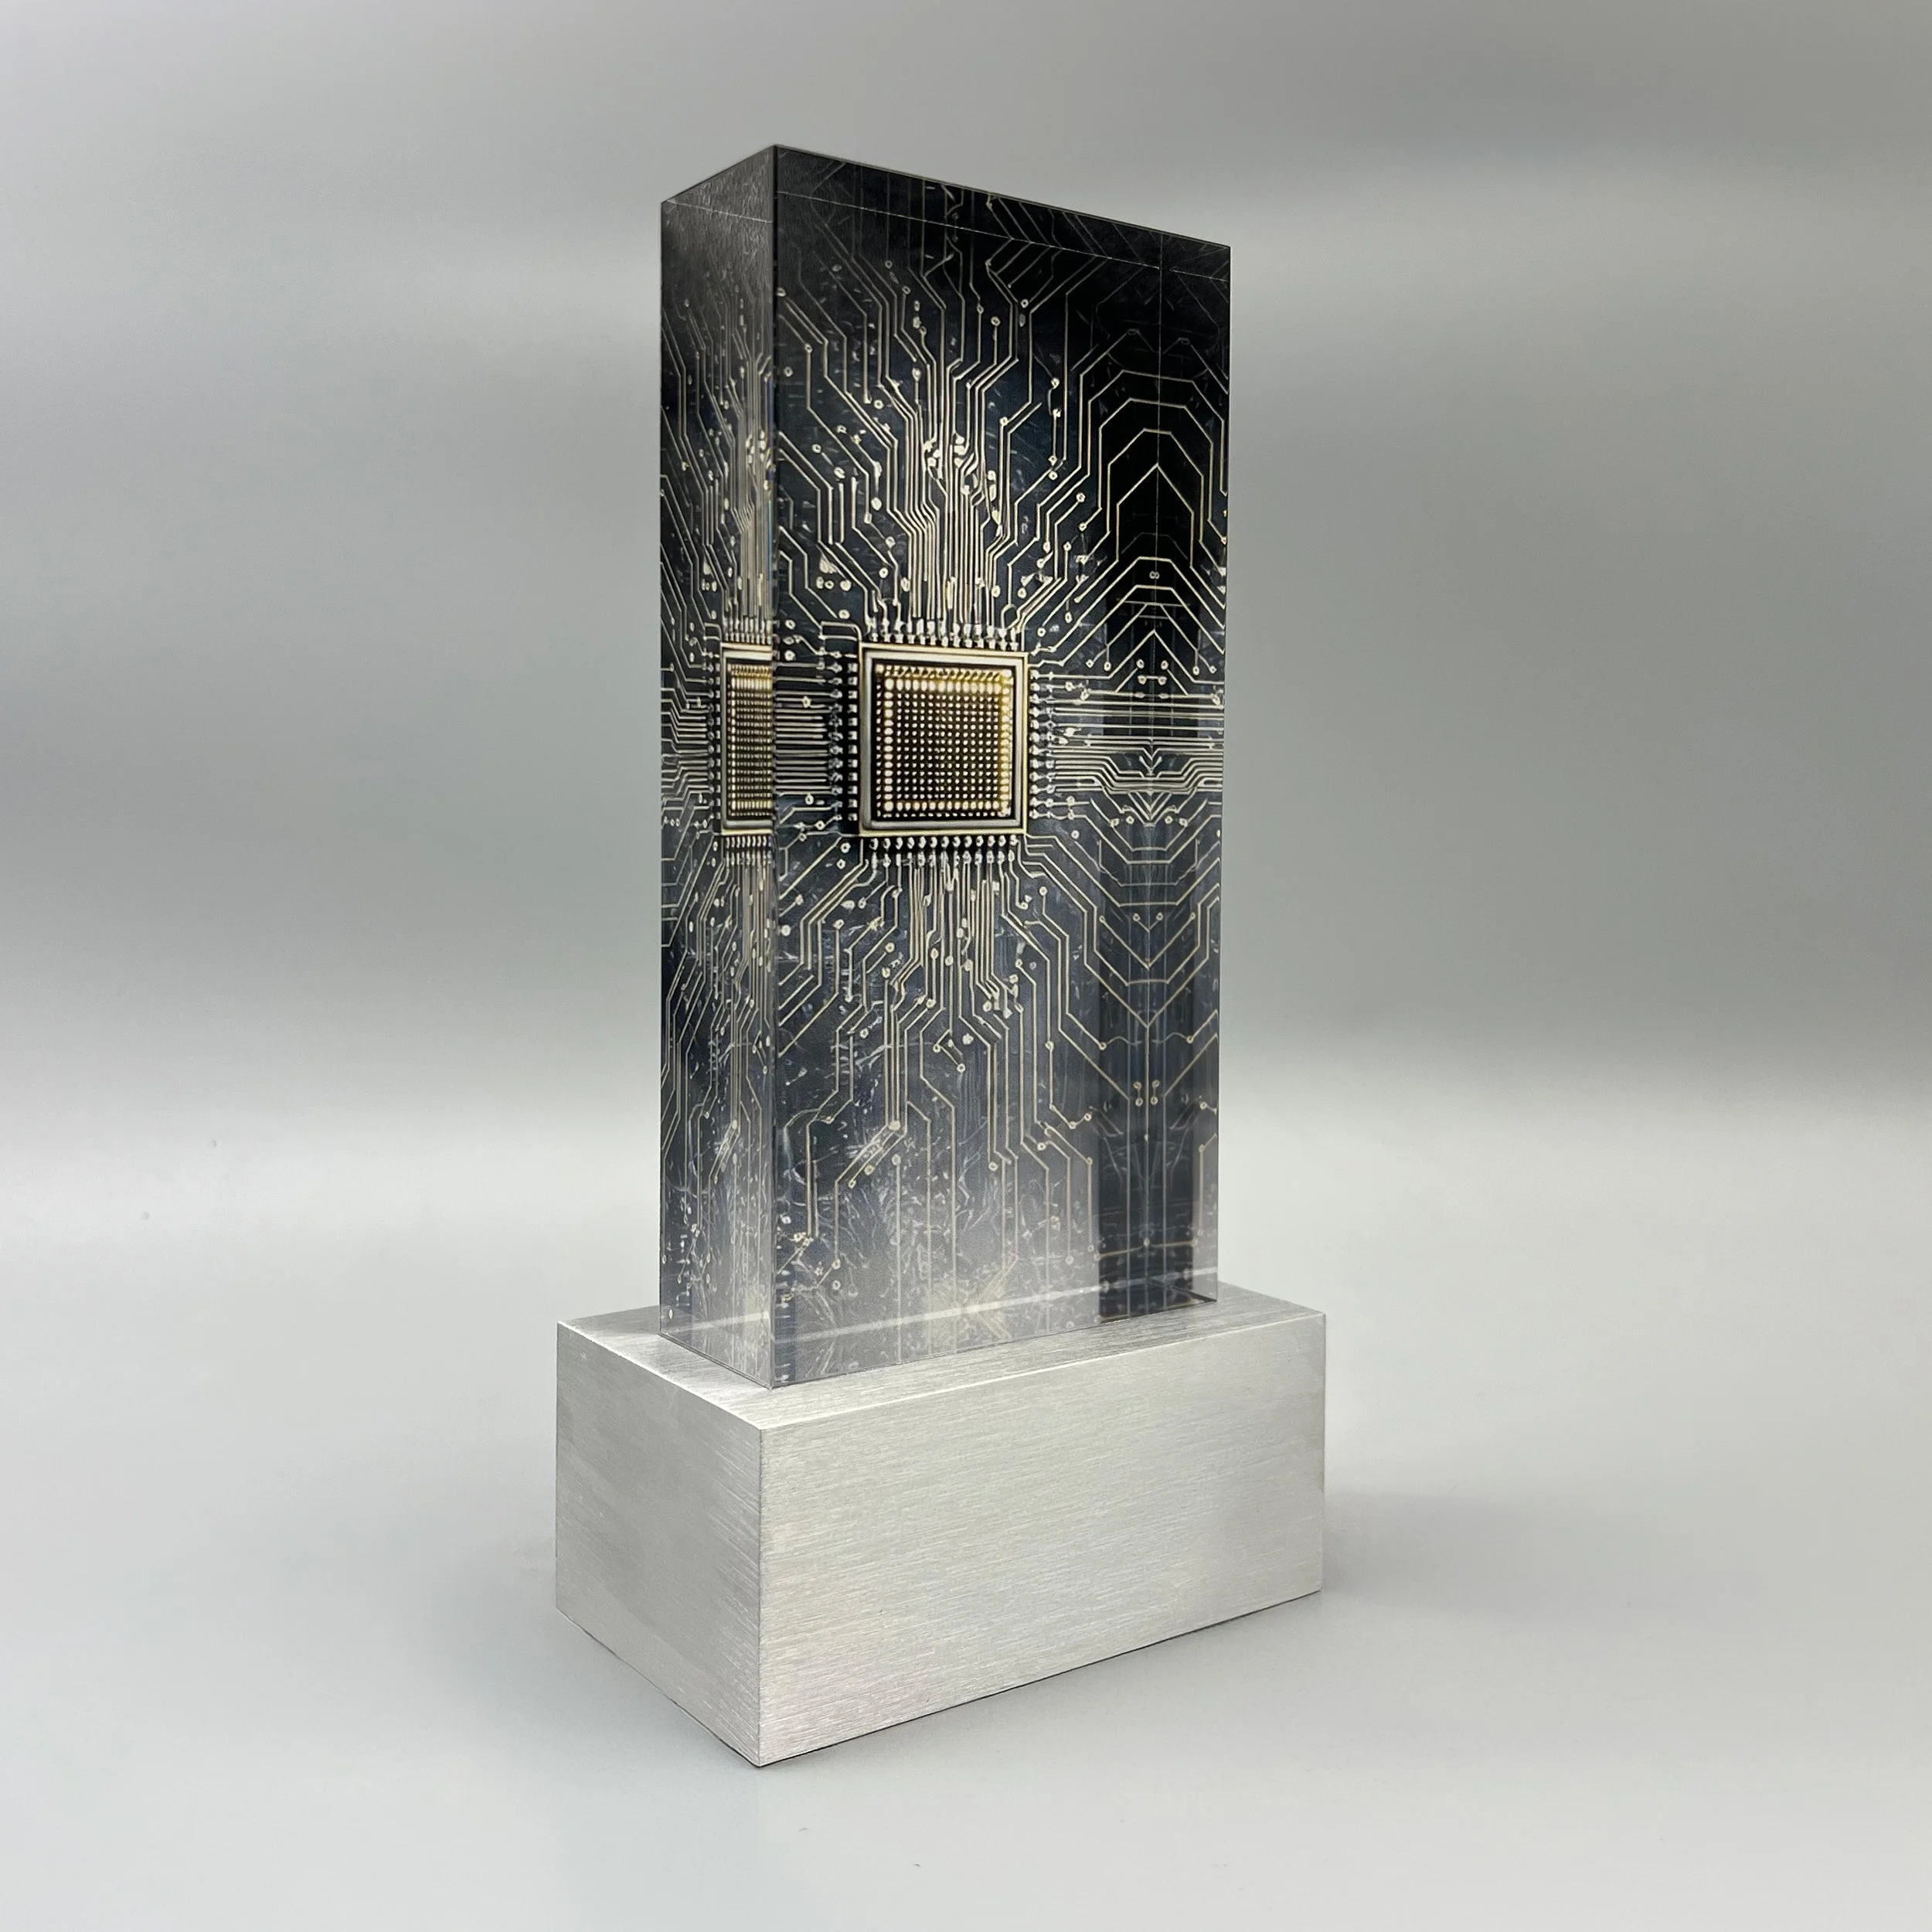
Front- and rear-surface printing gives this circuit-themed design depth within a single clear panel.
How can one deal toy show several buildings or locations?
Separate photo panels can bring several properties, locations or views into one deal toy. Rectangular panels preserve more of each photograph's composition, including surroundings that help explain the property. Arranging them at different heights and positions gives the images their own place within the piece.
In the property example below, a shorter photograph sits in front of a taller one, with a clear panel behind both. The rectangular edges keep the images easy to read, while the front-to-back arrangement gives the piece actual depth.
The important decision is how much of each image should remain visible. A foreground panel can cover an unimportant area of the image behind it while leaving its most recognizable features in view.
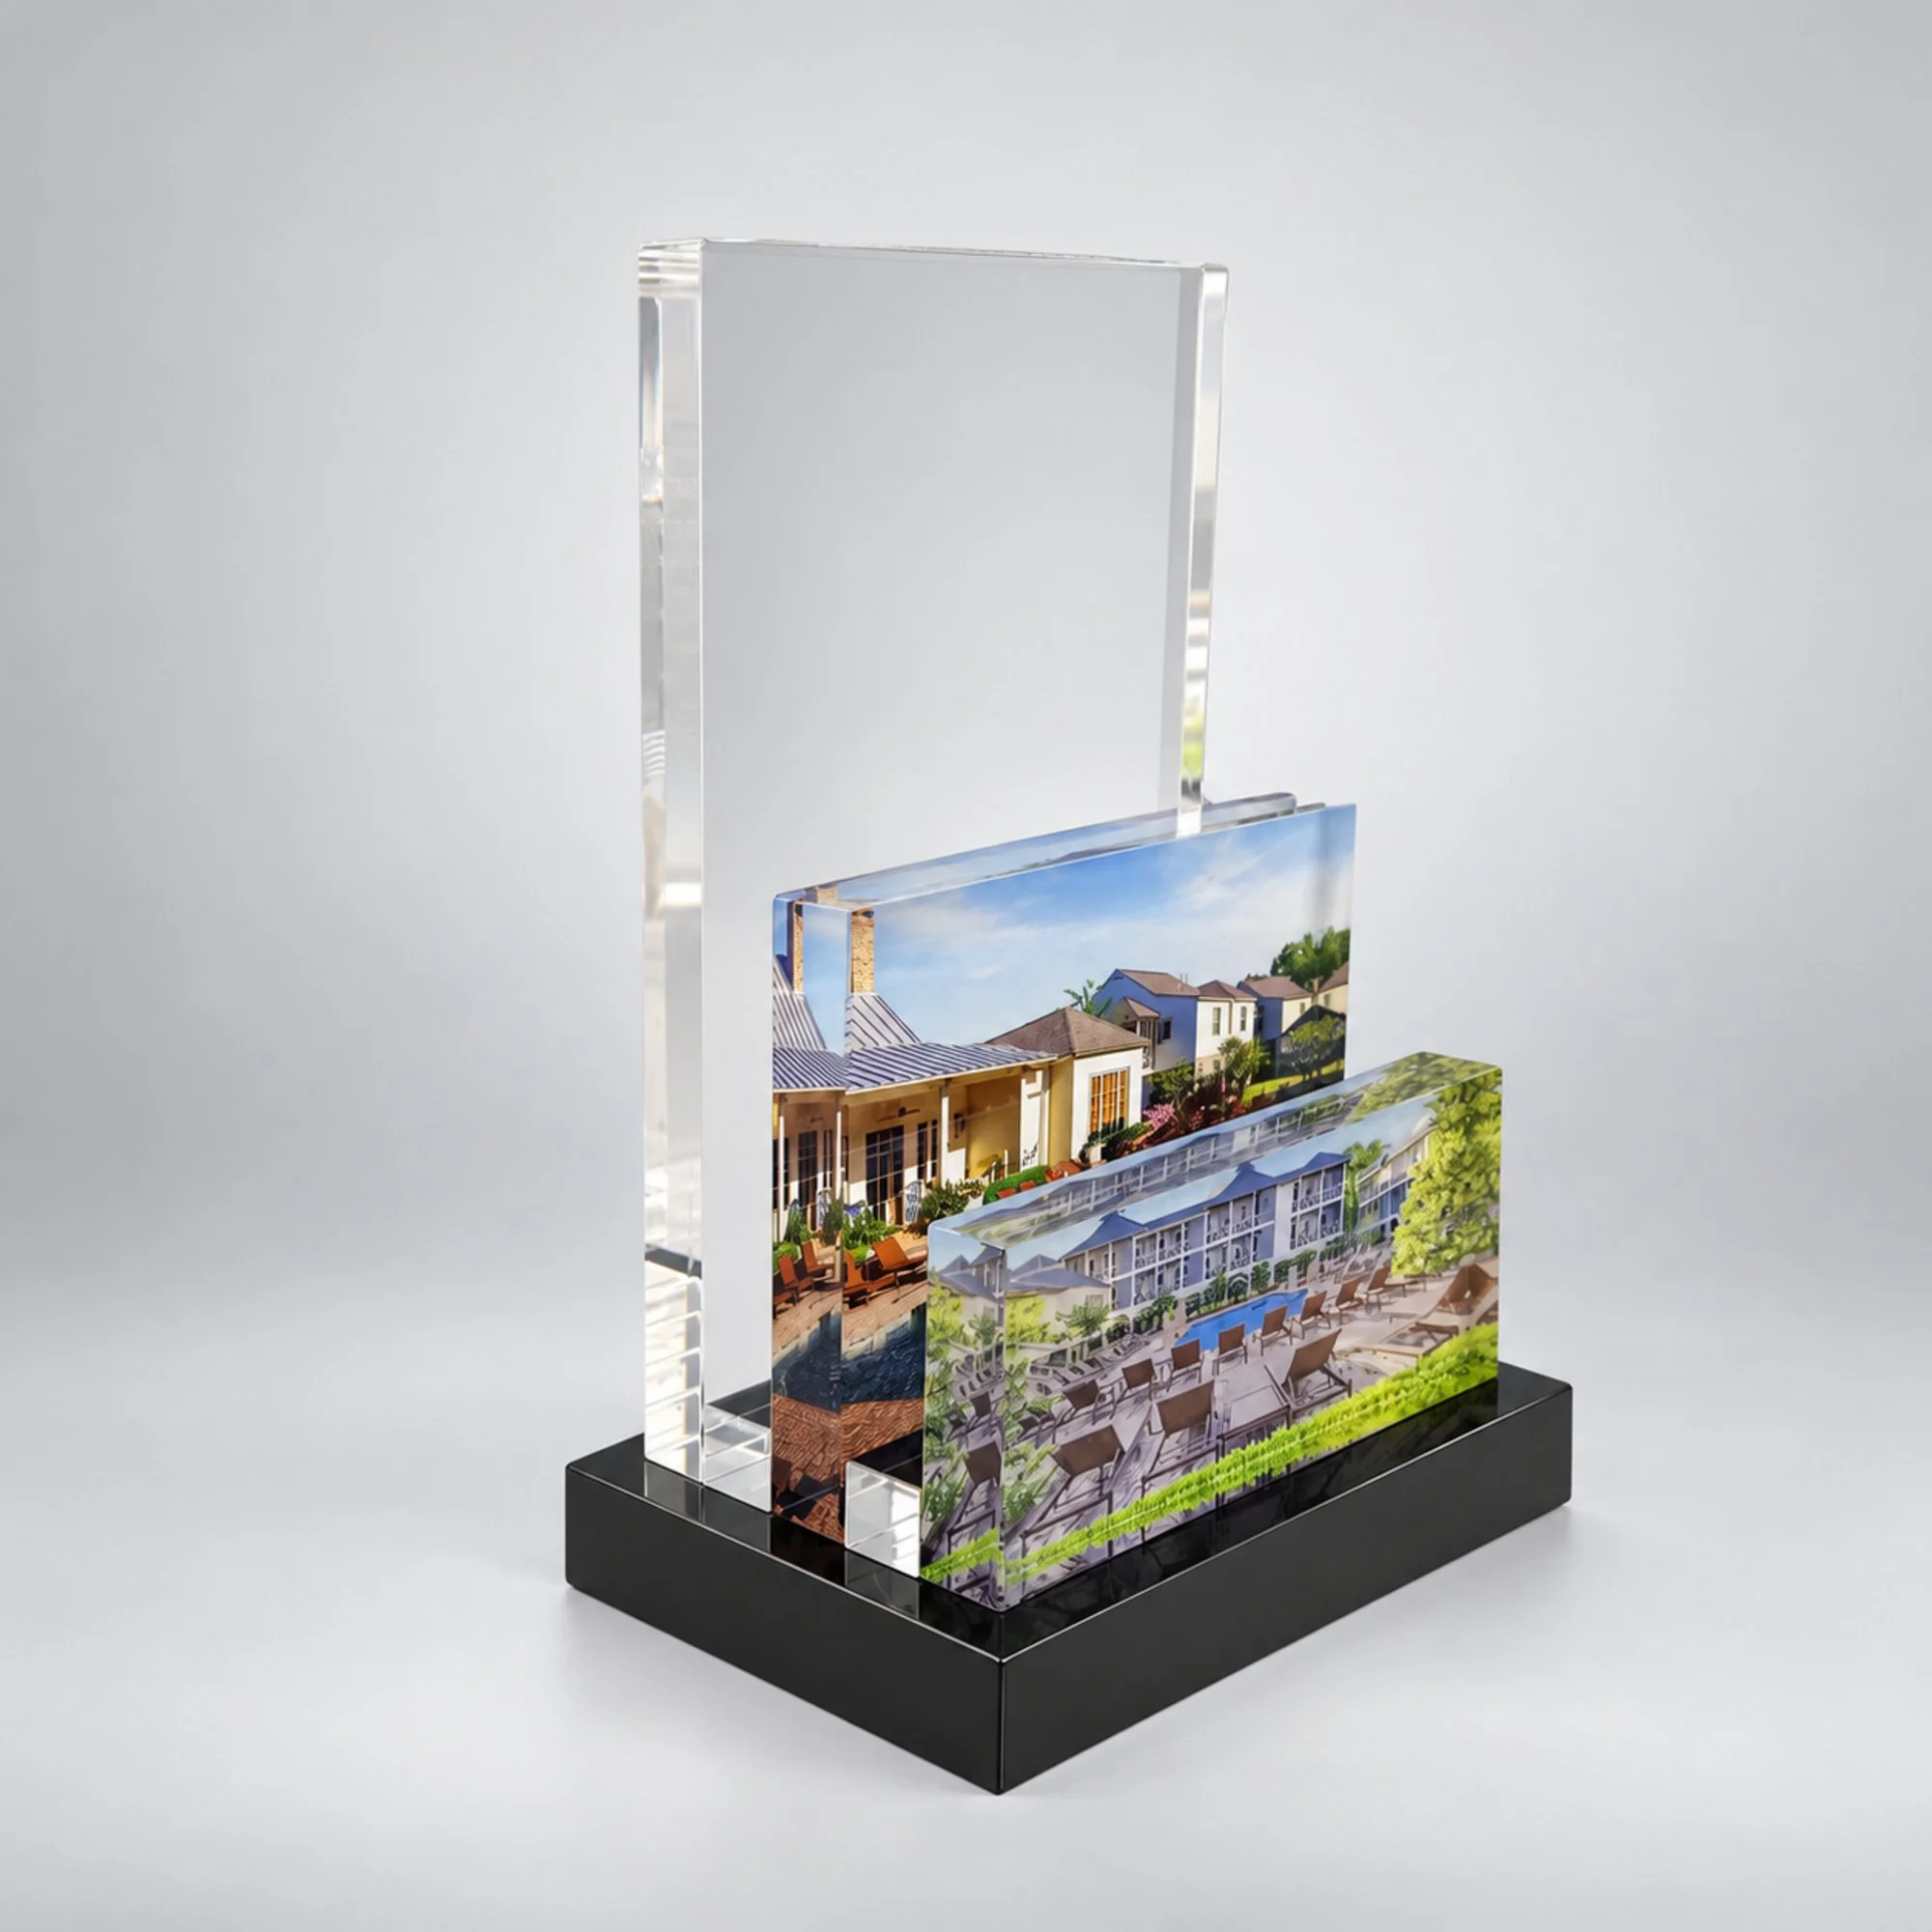
Two rectangular property-photo panels of different heights sit in front of a taller clear panel on a shared base.
Where should logos and transaction wording go?
Give the inscription a clear, readable area and arrange the imagery so it does not obscure the wording. Separate components can help: a row of small logo blocks can sit in front of a larger inscription panel, or staggered clear panels can carry different parts of the artwork. We plan the text and images together rather than fitting the inscription into whatever space remains.
In the example below, the individual logo blocks have their own thickness and position on the base. The larger panel provides a separate area for the transaction information. This arrangement gives each part of the design a clear role.
Layering can be closely stacked or more widely spaced, depending on the construction. We look at the overlap from the main viewing angle, the edges that will be visible from the side and how the components will be supported. The placement should make the subject and inscription easy to understand together.
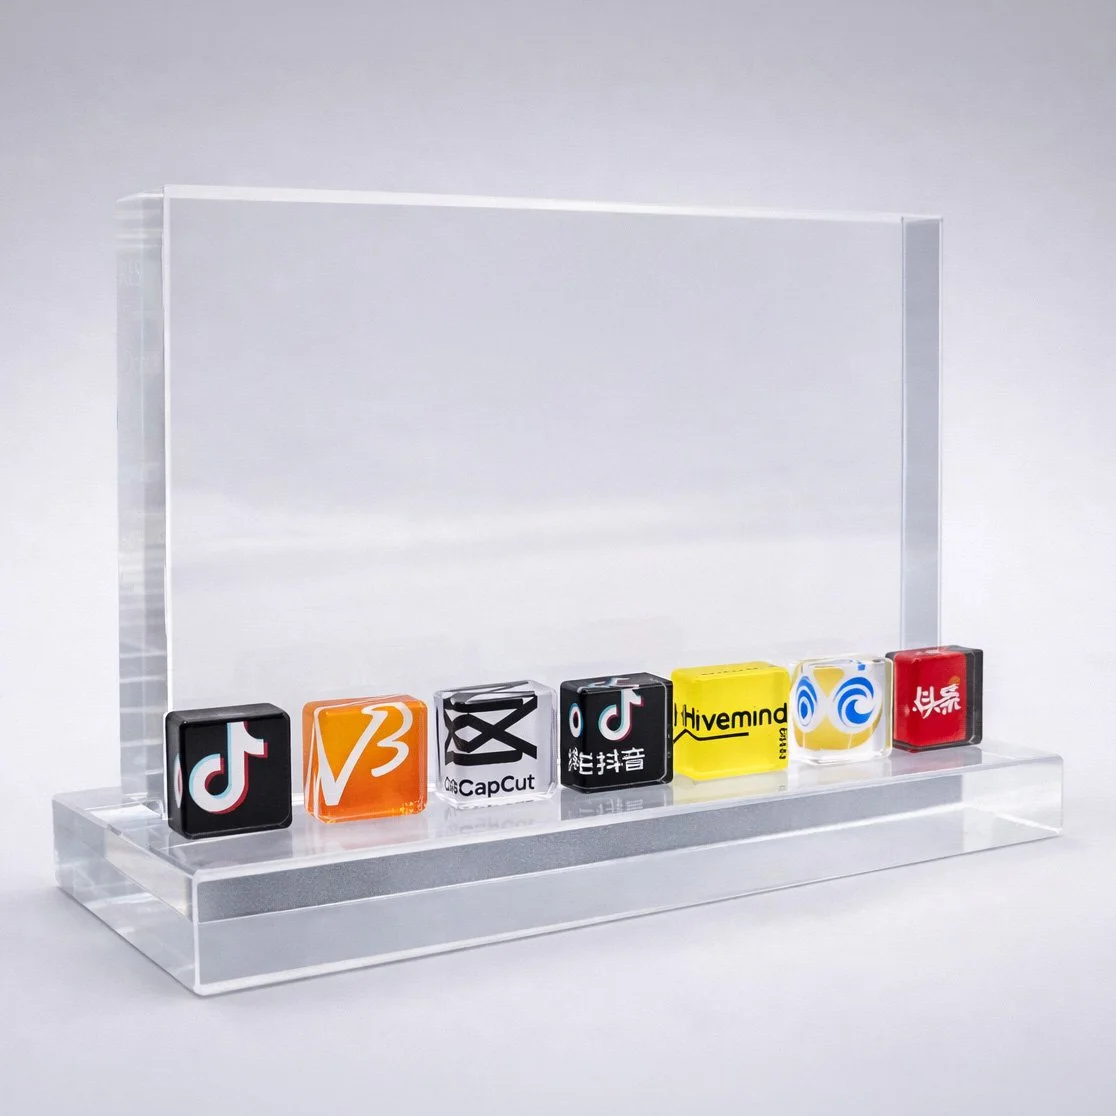
Separate logo blocks form a foreground row, with a larger clear panel behind them.
Which photograph should we use?
Choose a photograph that shows the subject's most recognizable features clearly at the intended finished size. Send the original high-resolution file when possible, along with any alternative views. A small image copied from a presentation gives us less room to crop or enlarge it.
A truck photographed from the side emphasizes its profile. A three-quarter view shows the front and side together. A building may be most recognizable from the entrance, or from an angle that shows the curve of its facade.
That choice matters because the photograph establishes the view people will see in the finished piece. Its perspective stays the same as you move around the award, while the clear edges, thickness and relationship between separate components become visible from other angles.
We look at resolution, lighting, cropping and the amount of useful detail. A dramatic photograph is not always the clearest one at a small scale. Sometimes a different viewpoint or a simpler background makes the design much stronger. The selected image also needs to be cleared for use in the finished pieces.
How do you keep a layered deal toy readable and stable?
Printing on clear material gives us choices about color, transparency and contrast. A white backing behind selected printed areas can make an image more opaque and help its colors stand out. Other designs benefit from allowing more light through the image. We choose the treatment for the effect we want, taking the background and surrounding clear areas into account.
Support is part of that same design process. A sufficiently substantial form may stand on its own; a tapered crystal wedge is one example. A base can support narrower elements, bring several components together and provide another place for an inscription.
We consider the contact area, balance, overall footprint and assembly before settling on the layout. A foreground element needs to leave the important lettering visible. Front and angled views help us assess the overlap; a physical prototype lets us check the construction, alignment and stability. At Polaris, every factory-produced custom project is prototyped and reviewed internally before the full production run. Client review may use photographs, video or an in-hand sample, depending on the project.
Are photo cut shapes less expensive or faster than sculptures?
A suitable printed cut shape can cost less and take less time to develop than a custom sculpture, but the comparison depends on the actual design. Compared with a molded-resin construction, for example, it can avoid making a sculptural master and mold and reduce some individual finishing work. A complex layered assembly can still require substantial preparation and finishing.
Image preparation, cutting, edge finishing, printing and assembly still take care. An intricate contour or several precisely positioned elements can add complexity. We look at the actual design and quantity before making a cost or timing comparison, including packaging, shipping and the required delivery date. Our project planning guide explains how those parts fit together.
A fully sculptural resin or cast-metal piece can be worth developing when seeing and handling the object from several angles is central to the idea. Our sculptural project examples show how that approach brings form and surface detail into a piece.
A photo-based approach is especially useful when a particular view, color or printed detail carries the subject well. Ask the provider to compare the complete construction, including setup, quantity, packaging and delivery, rather than judging cost by the material name alone.
What should you ask a deal toy provider before approving the design?
A useful proposal should explain how the visual idea will become a physical piece. Before approval, ask:
Which details will be printed, cut to shape or made as separate components?
Can we review front and angled views, with the inscription shown at its intended size?
Will the photograph and lettering have enough contrast against the clear areas and the background behind the piece?
How will the components be supported, checked in a prototype and protected for shipping?
Does the quote identify setup, production, packaging and delivery costs, and does the schedule allow for approvals and shipping?
Manufacturing experience helps us choose what the photograph can carry, where a physical outline contributes and how the printed surfaces and separate components should work together. The goal is a design that feels specific to the deal and makes good use of the construction.
Send us the subject or reference image, draft wording and logos, approximate quantity, budget range, and required in-hand date and delivery destination. You do not need a finished design to begin. We can then explore the combination of images, shapes and layers that suits your project.